
Visuals in Turkish · the full text is on this page
Tools · Social Media
How to transform product photos with ChatGPT Images 2.5: 20 ready-made image prompts (step by step)
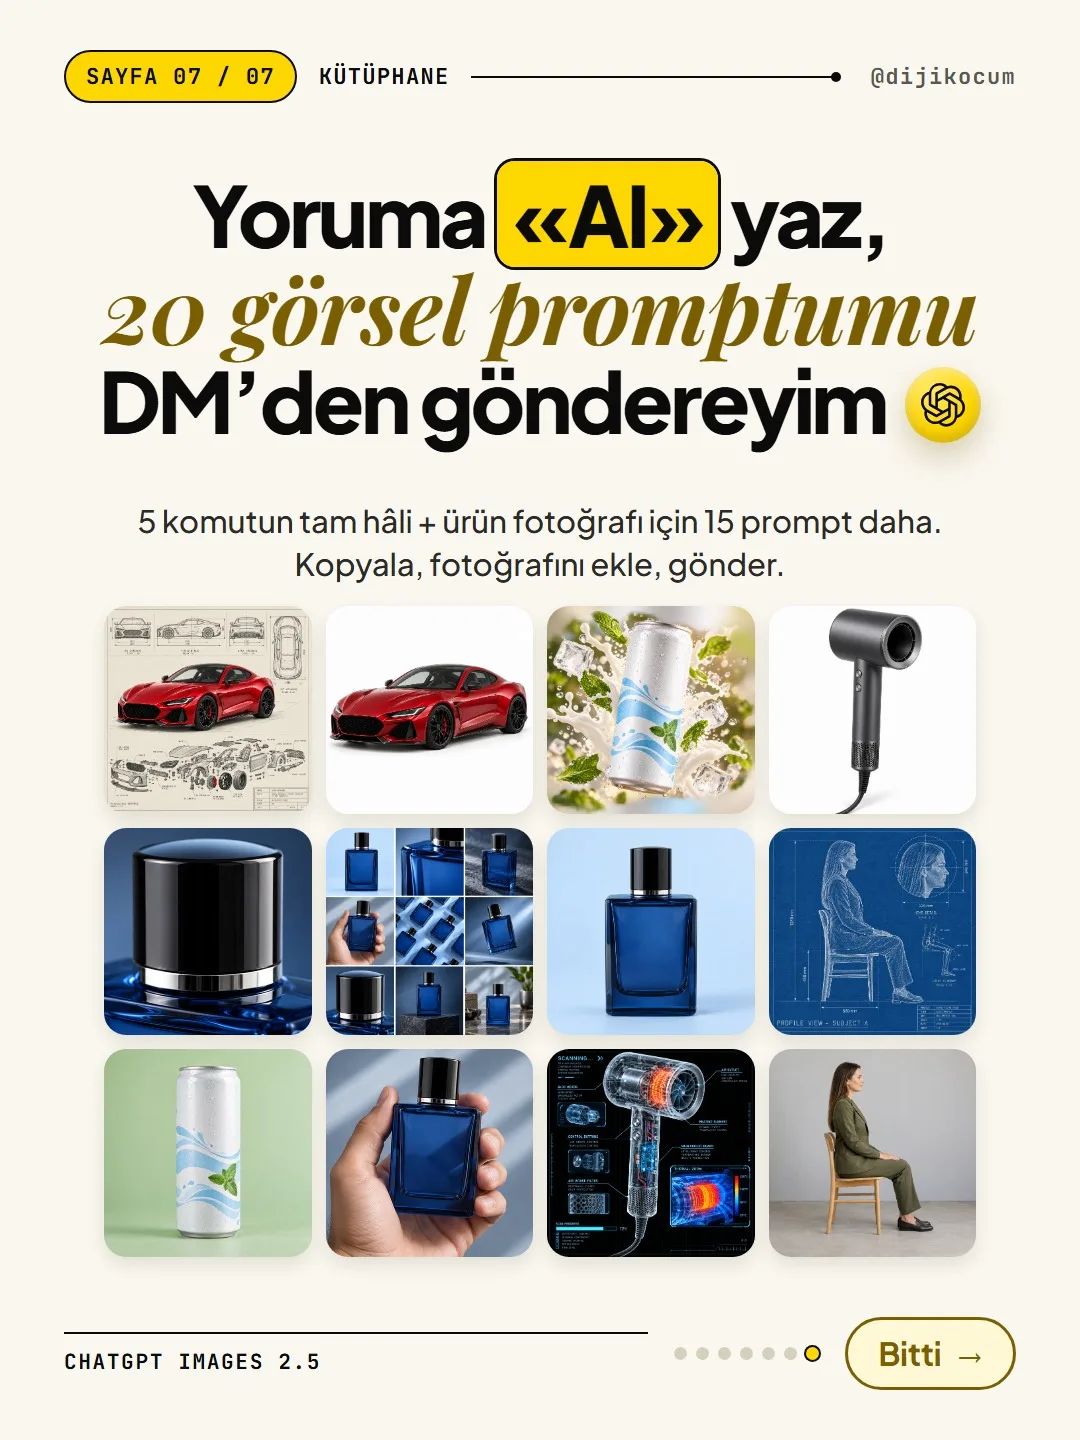
Upload a product photo, paste a single prompt: a technical drawing sheet, a 9-angle collage, a splash ad shot, a blue technical drawing or an X-ray image. The full versions of the 5 commands in the carousel and 15 more prompts are here.
Short answer
With ChatGPT Images 2.5, you can turn a product photo you already have into a technical drawing sheet, a 9-angle collage, a splash ad shot, a blue technical drawing or an X-ray image with a single prompt. All you have to do: add the photo in ChatGPT, copy and paste the prompt from here and send it. This page has the full versions of the 5 prompts in the carousel, 15 more prompts for product photos and an optional shortcut setup so you can use them just by typing /packshot.
26 steps · 14 min read · · Turan Yasin Salcı
Step by step · 26 steps
0/26 checked · saved in this browser only
What we'll do: product photo + one prompt = a new image.
OpenAI updated ChatGPT's image generation with ChatGPT Images 2.5 (announced on September 8, 2026). With this update, you can upload an ordinary product photo to ChatGPT and, with a single prompt, turn it into a technical drawing sheet, a 9-angle collage, a splash ad shot, a blue technical drawing or an X-ray image.
This page has the full versions of the 5 prompts in the carousel and 15 more prompts for product photos, 20 prompts in total. Every "after" image in the carousel was generated with the prompt here. Try it before renting a studio for a product shoot.
What do names like /packshot mean? (Important)
Words you see in the carousel such as
/explodedview,/360viewand/packshotare the prompt's short name. Typing just "/packshot" into ChatGPT doesn't work on its own; it isn't a built-in ChatGPT command.There are two ways to use them:
1. Copy and paste the full prompt every time (the easiest; the steps below explain this).
2. If you like, set up a shortcut once and then just type the photo +/packshot. How to do this is at the end of the page.How to use it: add the photo, paste the prompt, send.
- 01Open chatgpt.com or the ChatGPT app and start a new chat.
- 02Add a photo of your product with the + (add) button next to the message box. The product should be sharp, well lit and fully visible.
- 03Copy any of the prompts below as is and paste it into the message box. If there's a part in square brackets (only /packshot and /infographic have one), replace it with your own details.
- 04Send it. The image arrives as a reply in the same chat; click it to download.
Honest note: The result won't be exactly the same every time. Two tries with the same photo and the same prompt can look different; if you don't like it, type "generate it again" in the same chat or say what you want to change ("don't change the product's color," "make the background darker"). If your product's shape or color has changed, be sure to notice it before using the image.
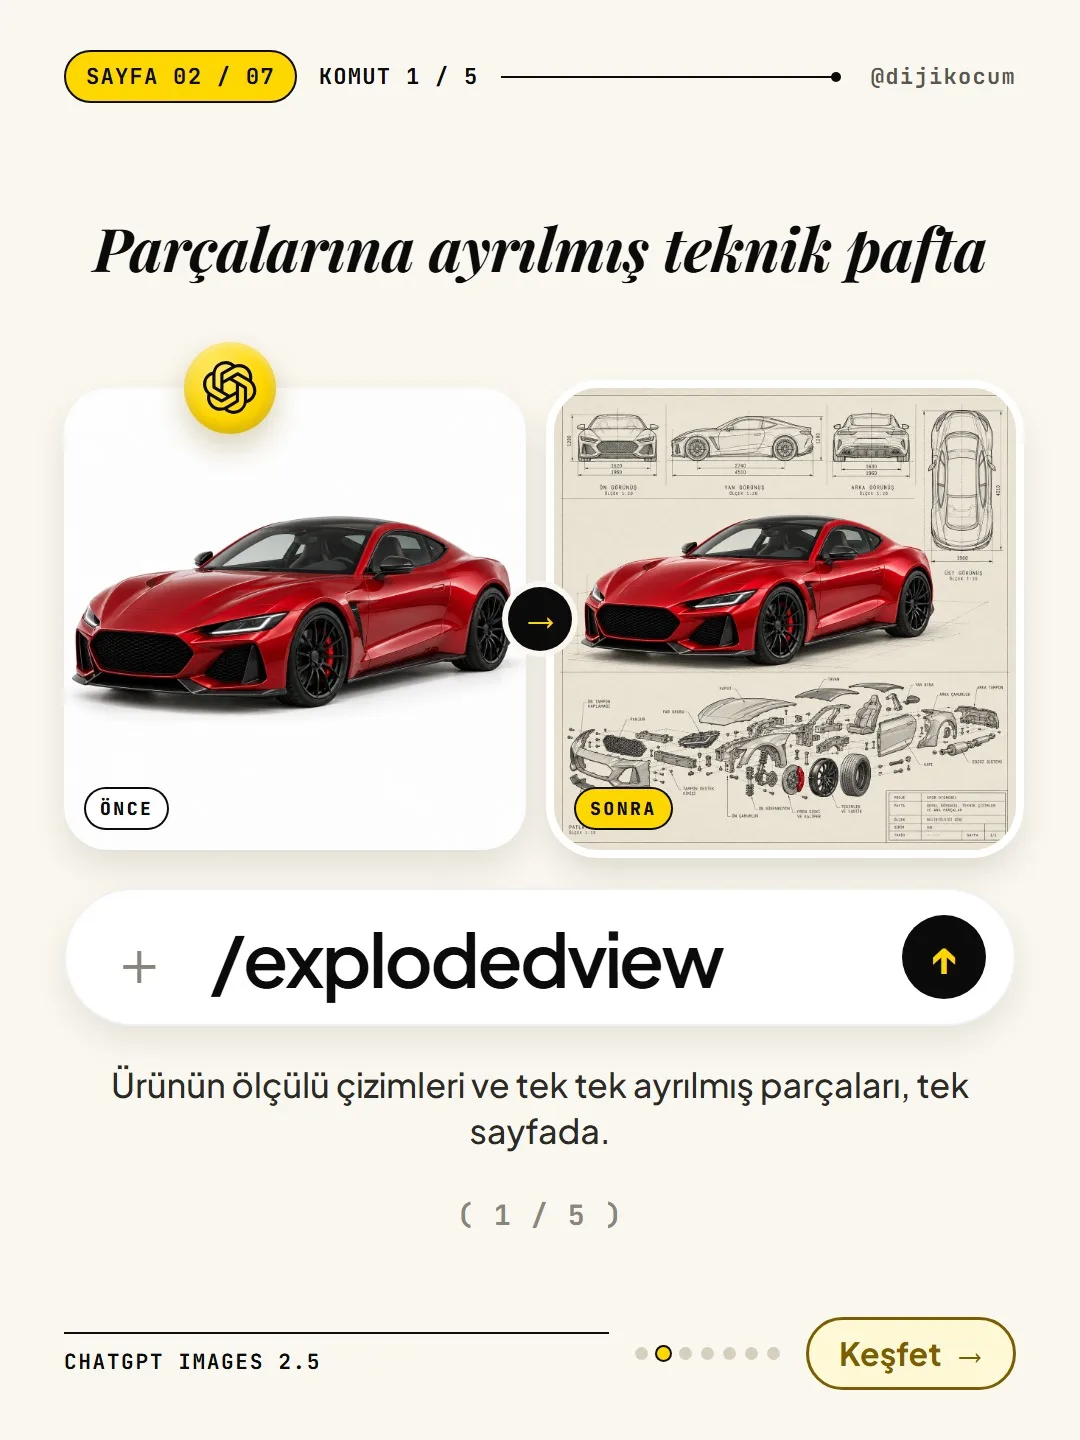
Command 1 / 5 · /explodedview · A technical sheet with the product taken apart
What it does: Dimensioned drawings of the product and its individually separated parts, on a single sheet.
The best results come from products with distinct parts (cars, furniture, electronics, kitchen appliances). The example in the carousel used a photo of an unbranded red sports coupe.
Add your photo, paste the full prompt below and send:
Turn the product in the attached photo, with the same color, design and proportions, into an engineering presentation sheet on cream-colored, lightly textured technical paper. Put a photorealistic version of the product in the center. In the top strip, front, side and rear technical drawing views with dimension lines; on the right, a top view. In the bottom strip, an exploded view of the product's main parts: parts separated from each other along an axis, screws and fasteners separate, each part connected by a thin line to a short label. A small title block in the bottom right. Drawings in black-gray ink; the only colored element is the product's own photo. Don't write any brand name or logo. Square (1:1), high resolution.Command 2 / 5 · /360view · The same product, 9 different angles
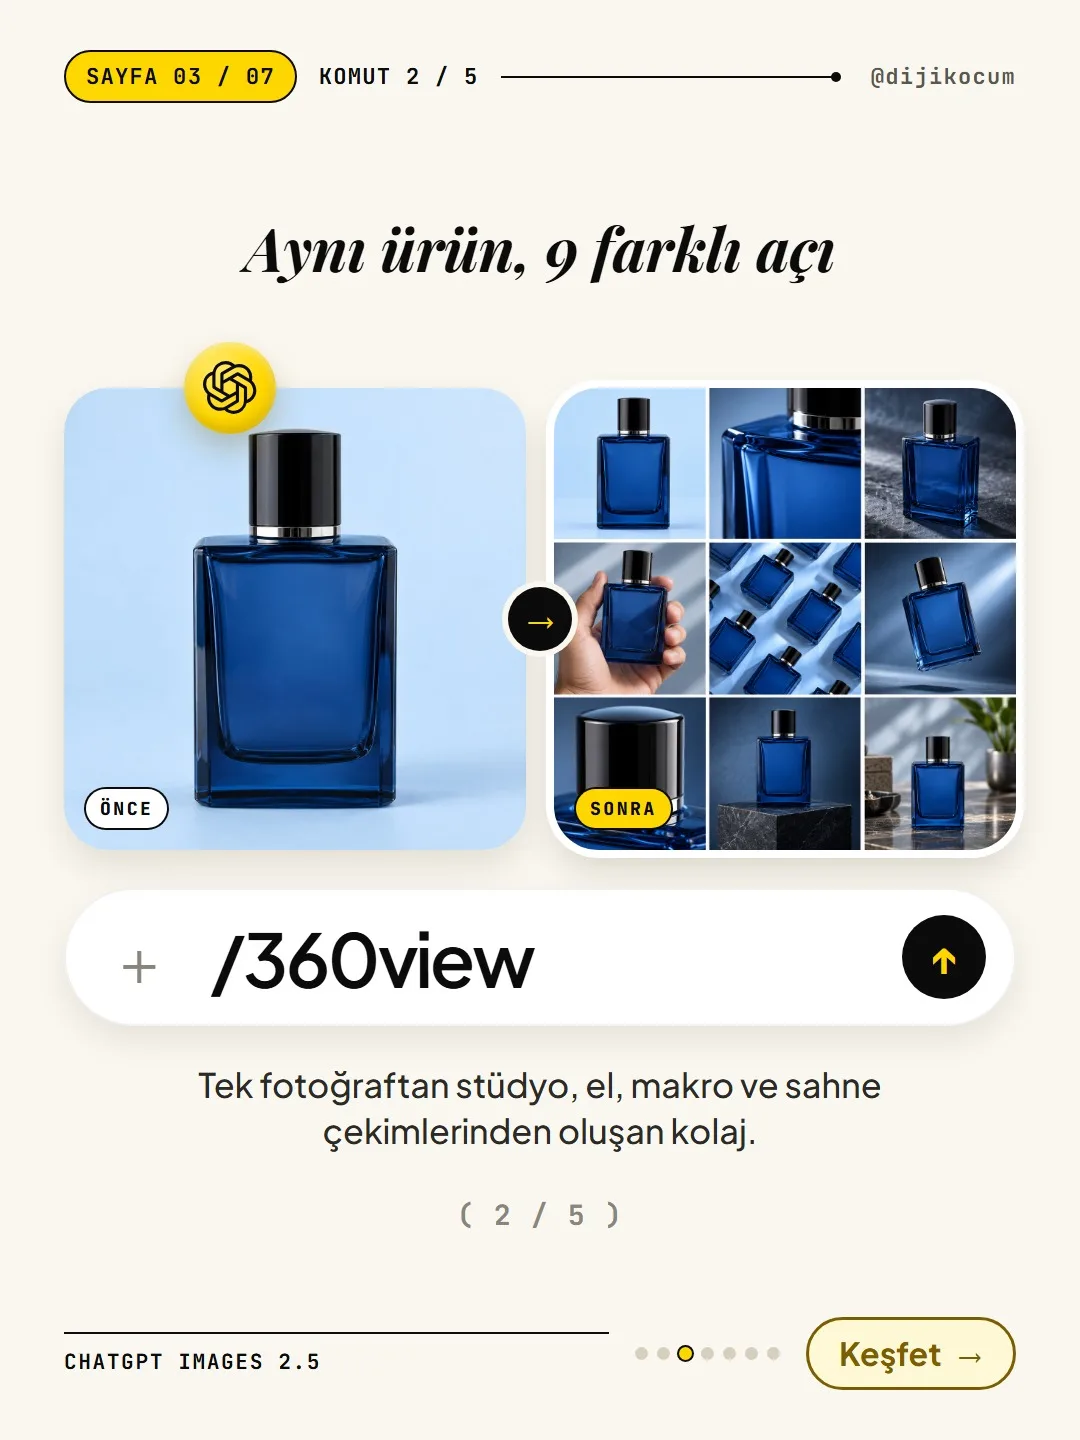
What it does: A collage of studio, in-hand, macro and scene shots from a single photo.
The example in the carousel used an unbranded navy perfume bottle. Since the nine frames come in a single image, you'll need to crop them afterward if you want to use them individually.
Add your photo, paste the full prompt below and send:
Keeping the product in the attached photo exactly the same (shape, color, material, cap, proportions), create a product collage on a 3x3 grid. Make each of the nine frames a different angle or scene: 1) front studio shot, 2) close-up detail of the surface, 3) 3/4 angle on a dark stone surface, 4) a natural shot held in a hand, 5) many products neatly arranged, seen from above, 6) a shot floating in the air with dramatic lighting, 7) a macro very close to the cap, 8) a display shot on a dark pedestal, 9) a lifestyle scene on a tabletop. All in the same color palette and lighting, like real photos; thin white gaps between the frames. Don't add text or logos. Square (1:1).Command 3 / 5 · /packshot · An ad shot with splashing ingredients
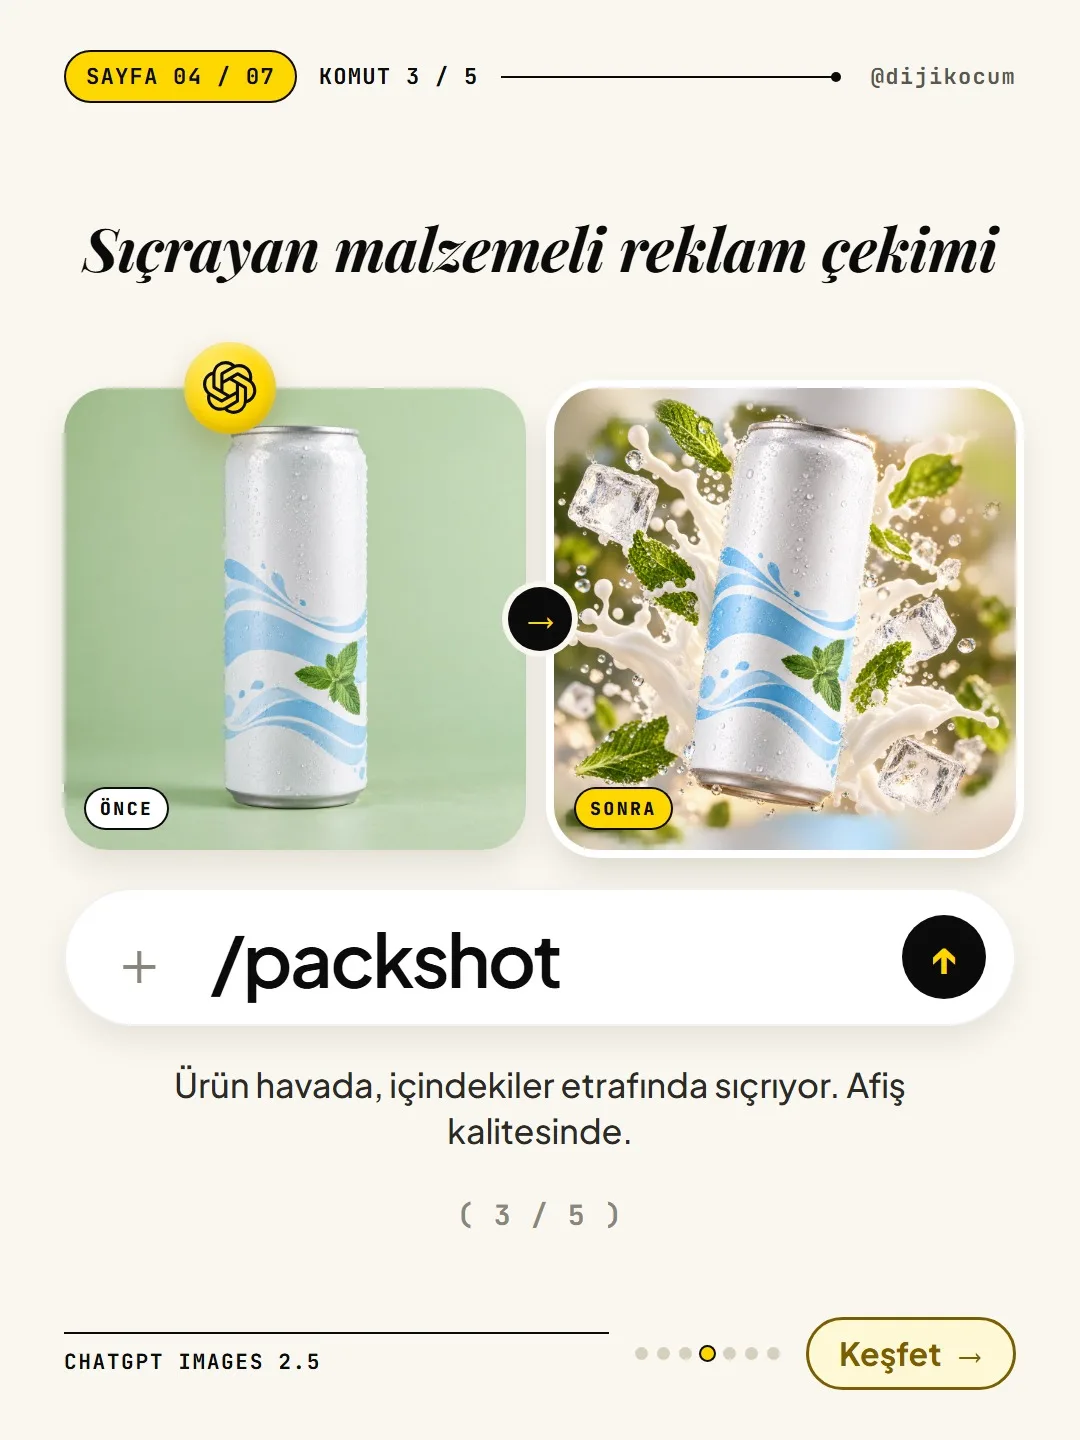
What it does: The product is in midair, with its ingredients splashing around it. Poster quality.
The part you need to change: delete the
[INGREDIENTS — e.g. ...]part in square brackets and write your own product's ingredients instead. For example, for an olive oil bottle: "golden olive oil splash, green olives, an olive branch, droplets". Don't leave the brackets or the "e.g." part. The example in the carousel used yogurt, mint and ice for an unbranded carton of ayran (a Turkish yogurt drink).Add your photo, paste the full prompt below and send:
Keeping the product in the attached photo exactly as it is (don't change its color, pattern or shape), shoot a packshot of advertising-poster quality: the product slightly tilted, centered and in midair; around it, ingredients that tell what's inside splash dynamically: [INGREDIENTS — e.g. for ayran (yogurt drink): a cold white yogurt splash, fresh mint leaves, ice cubes, droplets]. Warm backlight, shallow depth of field, frozen motion, sharp droplets. A real commercial photo look, not a 3D render. Don't add text. Square (1:1).Command 4 / 5 · /blueprint · A blue technical drawing
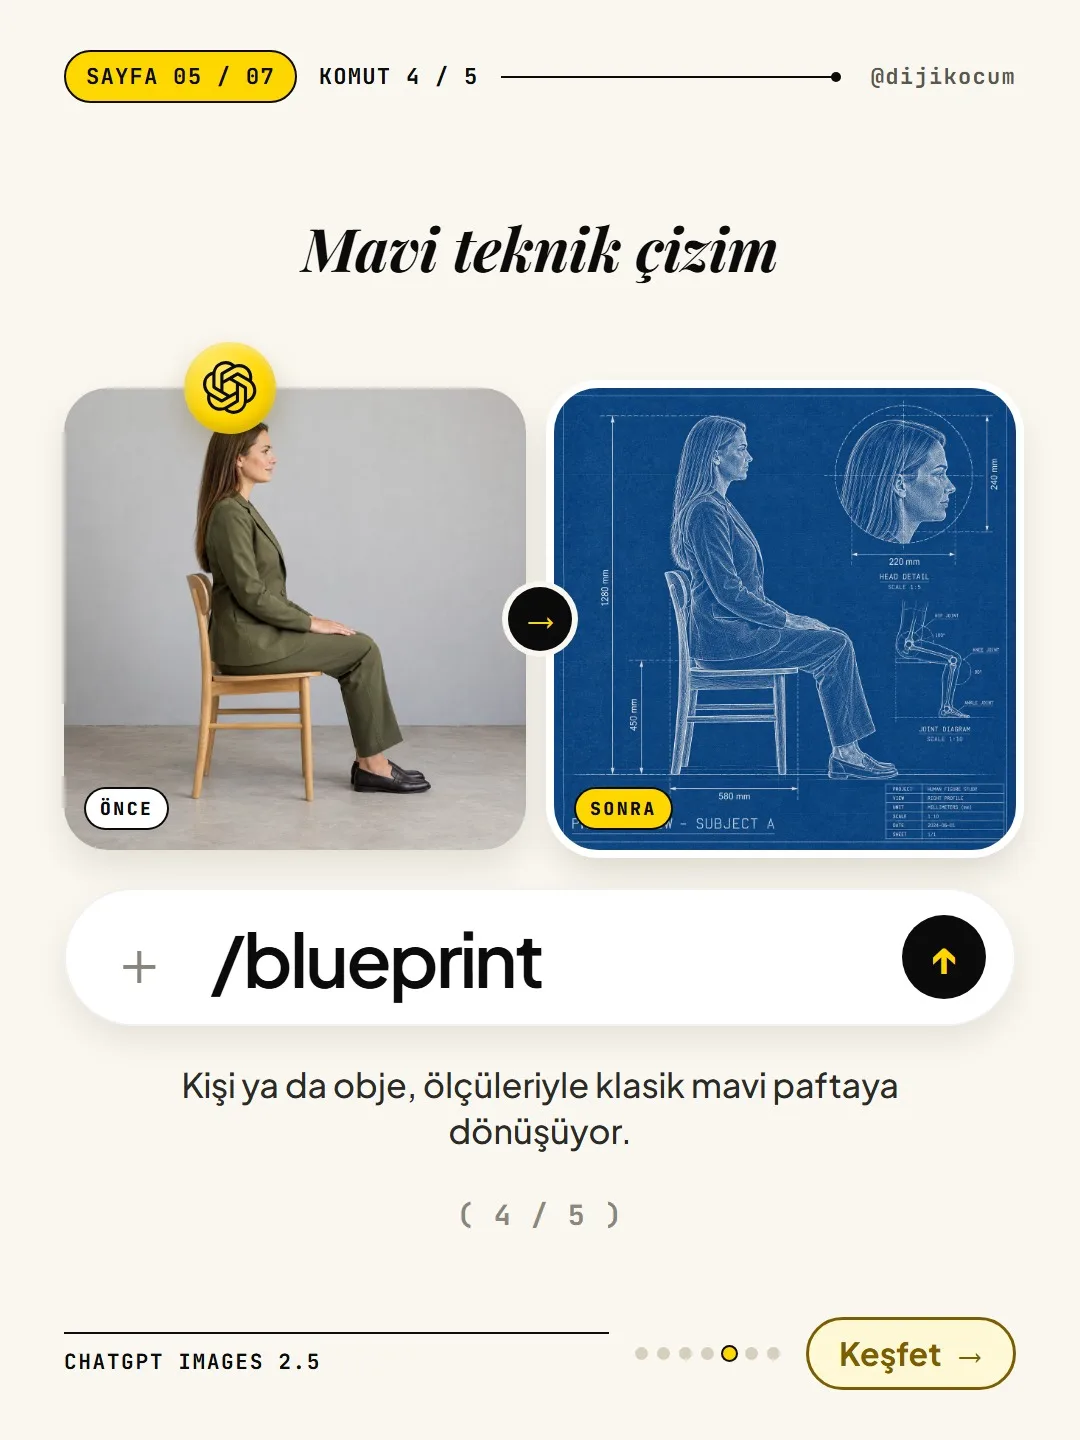
What it does: A person or object becomes a classic blueprint, with dimensions.
It works with both photos of people and photos of objects; the prompt has parts written for both, so you don't need to change anything. The example in the carousel used a photo of a fictional woman sitting sideways on a chair.
Add your photo, paste the full prompt below and send:
Turn the person (or object) in the attached photo, with the same pose and proportions, into a classic blue technical drawing (blueprint): blue paper background, thin white outlines, a light paper texture. Dimension arrows in mm for height, seat height and depth; in the top right, an enlarged detail of the head profile (for an object, its most important part) and a small joint diagram. At the bottom, the heading "PROFILE VIEW - SUBJECT A" and a small title box. No photo color should remain, only white lines. Square (1:1).Command 5 / 5 · /xray · An X-ray scan view
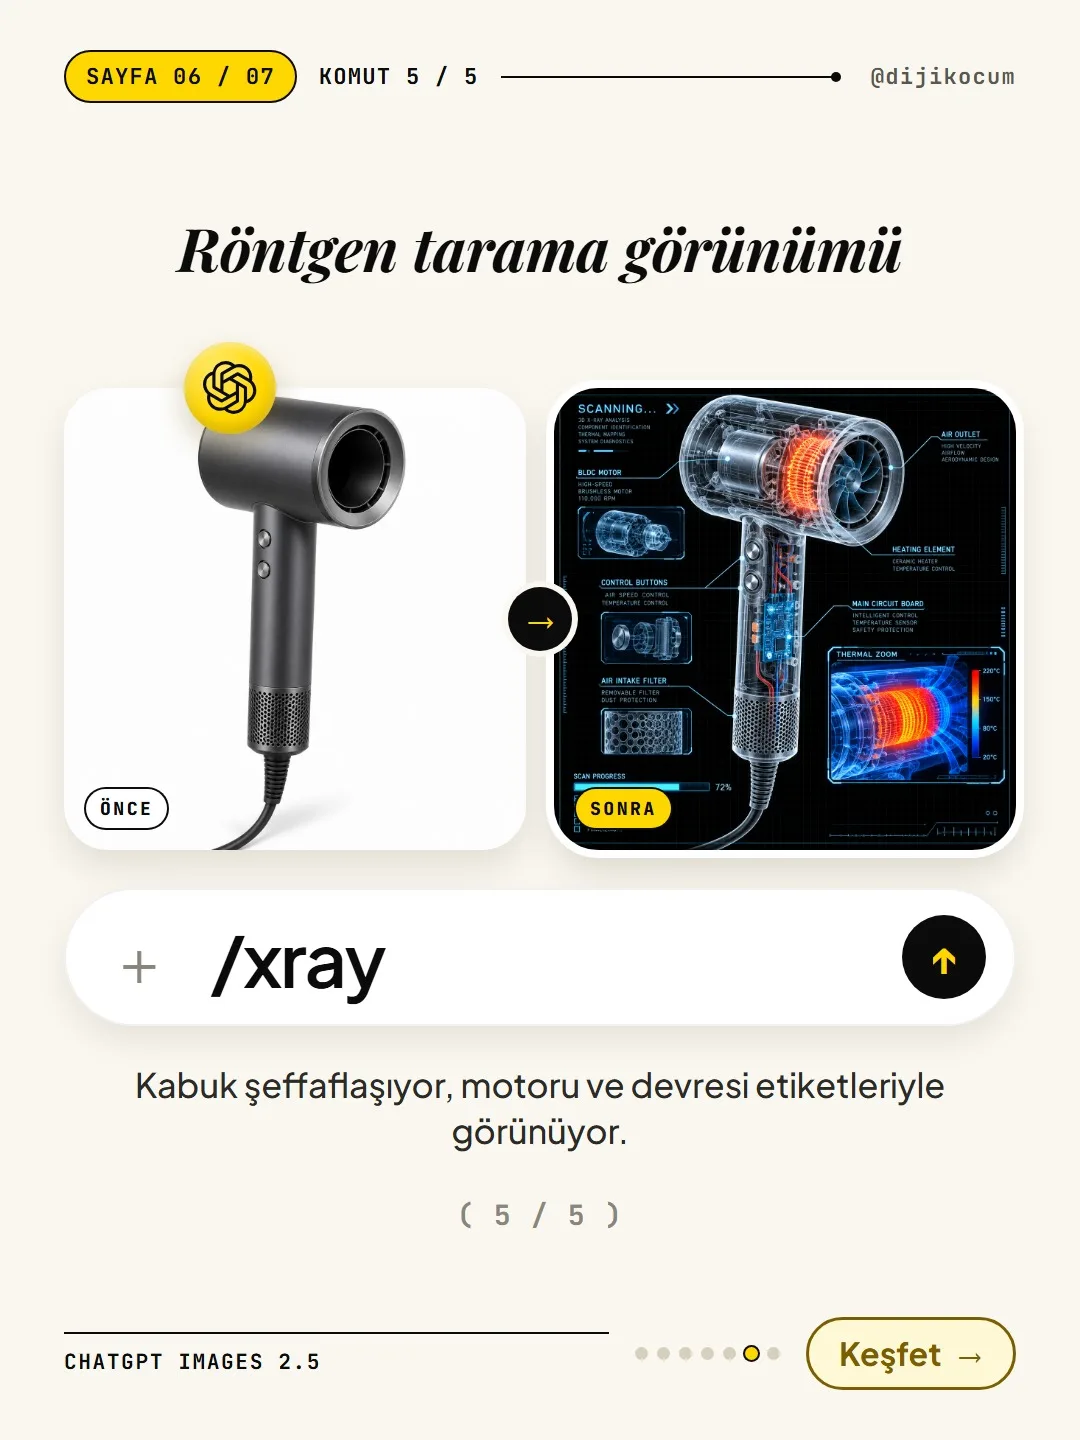
What it does: The shell becomes transparent, and the motor and circuitry are visible with labels.
It gives the most striking results on products with a motor or circuitry inside (hair dryers, coffee machines, headphones). The example in the carousel used an unbranded hair dryer.
Add your photo, paste the full prompt below and send:
Turn the product in the attached photo, at the same angle and pose, into an X-ray scan image: black background, a fine grid; the product's outer shell as semi-transparent white wireframe lines, with the motor, fan, heater, cables and circuitry inside visible (the internal parts of whatever the product is). Add a sci-fi scanning interface around it: corner frames, "SCANNING..." in the top left, 4-5 English labels connected to the parts with thin lines, a close-up box with a blue-red heat map of one area in the bottom right, a progress bar in the bottom left. Square (1:1).Prompt 6 · /whitebg
The basic image for e-commerce sites and marketplace product listings. Add your photo, paste the prompt, send:
Place the attached product on a pure white (#FFFFFF) e-commerce background without changing any of its details. Remove everything in the background, put a soft, natural contact shadow under the product, keep the colors true to life and keep the edges clean. The product should fill about 80% of the frame, centered. Square (1:1).Prompt 7 · /flatlay
Shows the product from above with objects from the moment it's used; suitable for an Instagram post. Add your photo, paste the prompt, send:
Place the attached product at the center of a composition shot straight down from above (flat lay). Around it, arrange 5-7 real objects from the same moment of use as the product at even intervals; the surface is solid-colored linen or paper. Soft daylight, distinct but light shadows, the simplicity of a magazine photo. Keep the product exactly as it is. Square (1:1).Prompt 8 · /onmodel
A lifestyle photo with a model who isn't a real person; it comes out vertical (4:5). Add your photo, paste the prompt, send:
Place the attached product in a lifestyle photo where a generic-looking model who isn't a real person uses it naturally (holding it or wearing/carrying it). Keep the product label and color exactly as they are; hands should look natural, with five fingers. Daylight, shallow depth of field, a real photo look. Vertical (4:5).Prompt 9 · /seasons
A 2x2 grid showing the same product in four seasons; for campaign periods. Add your photo, paste the prompt, send:
Show the attached product at the same angle in four seasonal scenes: a 2x2 grid; spring (flowers), summer (sun and water), fall (leaves), winter (snow and warm light). The product should be exactly the same in every frame; only the scene and lighting change. A real photo look, no text. Square (1:1).Prompt 10 · /miniature
Miniature people seem to be working around the product; an eye-catching image for posting. Add your photo, paste the prompt, send:
Put the attached product on a table like a giant object; around it, 1:87 scale miniature people work as if they're building, cleaning or packaging it. Tilt-shift effect, shallow depth of field, warm light. Keep the product exactly as it is. Square (1:1).Prompt 11 · /cutaway
Half of the product is cut away, and its internal structure is visible with labels. Add your photo, paste the prompt, send:
Create a cutaway view of the attached product: half of the outer body is cut away, with its internal structure and parts visible; keep the color and design the same. White background, with 6-8 short labels around it connected to the parts by thin lines. Infographic clarity. Square (1:1).Prompt 12 · /isometric
Shows the product or your venue (shop, cafe) as an isometric scale model. Add your photo, paste the prompt, send:
Recreate the attached product (or venue) as a 30-degree isometric bird's-eye 3D scale model (diorama): on a cut-out ground block, white empty background, realistic textures, soft daylight and subtle shadows. Same colors and materials. No text. Square (1:1).Prompt 13 · /levitate
The product floats in midair in a minimal studio; a luxury ad feel. Add your photo, paste the prompt, send:
Show the attached product floating in midair in a minimal studio: slightly tilted, a soft shadow beneath it, the background a light shade of the product's main color. A clean, luxury ad feel; keep the product exactly as it is. No text. Square (1:1).Prompt 14 · /pastel
A studio setup on pastel podiums. Add your photo, paste the prompt, send:
Show the attached product on pastel-colored geometric podiums (cylinder, cube, arch) in a studio setup with two or three pastel tones that match the product's colors. Hard daylight and crisp shadows. Keep the product exactly as it is, no text. Square (1:1).Prompt 15 · /night
A cinematic neon-lit frame on a rainy city night; it comes out vertical (4:5). Add your photo, paste the prompt, send:
Place the attached product in a cinematic ad frame shot on a rainy city night, on wet ground with neon reflections. The product sharp and kept exactly as it is, the background bokeh. A real photo look, no text. Vertical (4:5).Prompt 16 · /macro
Shows the product's texture and material extremely close up. Add your photo, paste the prompt, send:
Show the most characteristic surface of the attached product (texture, material, stitching, glass, metal) in an extreme close-up macro shot. Light should come from an angle that brings out the texture, with a very shallow depth of field. Stay true to the product's real material. Square (1:1).Prompt 17 · /unboxing
The unboxing moment; the box has no text or logo. Add your photo, paste the prompt, send:
Shoot the unboxing moment of the attached product from above: an opened plain kraft box, tissue paper, the product inside and next to the box, a hand lifting the lid. Hands natural, with five fingers. Soft daylight, a real photo. No text or logo on the box. Square (1:1).Prompt 18 · /catalog
4 color options of the same product side by side; it comes out horizontal (3:2). Don't present a color option that doesn't actually exist as if you were selling it. Add your photo, paste the prompt, send:
Show the attached product in 4 different color options side by side, at the same angle and lighting, on a light gray background in a catalog layout. Shape, size and details exactly the same; only the main color changes. No text. Horizontal (3:2).Prompt 19 · /infographic
The part you need to change: delete the
[THE PRODUCT'S 4 FEATURES]part at the end and write your own product's 4 features instead, separated by commas (e.g. "waterproof, 12-hour battery, 180 grams, 2-year warranty"). Don't leave the square brackets. Be sure to check the text letter by letter. Add your photo, paste the prompt, send:Put the attached product in the center and build a simple infographic around it describing its 4 standout features: for each feature, a small line icon + a 2-4 word heading in English, connected to the product with thin lines. Light background, plenty of white space, no spelling mistakes. Write the features based on this: [THE PRODUCT'S 4 FEATURES]. Square (1:1).Prompt 20 · /sticker
Turns the product into a sticker illustration; for stories and in-package cards. Add your photo, paste the prompt, send:
Turn the attached product into a glossy, flat-colored sticker illustration with a thick white border. The shape and colors should stay recognizable, with a light shadow and a plain light-colored background. No text. Square (1:1).Shortcut setup (optional): just add the photo and type /packshot.
If you don't want to paste the long prompt every time:
- 01Open a new Project in ChatGPT.
- 02Save the prompts on this page as a text file (with each prompt's short name at its start, e.g. "/packshot") and add the file to the project.
- 03Write the sentence below in the project's instructions.
From then on, in that project, the photo +
/packshotis all you need to type. The shortcut only works in chats inside that project; outside the project, you still need to paste the full prompt.If my message comes with a command starting with / (e.g. /packshot), find the prompt with the same name in the project file and apply it to the attached photo.Tips and things to watch out for.
- Label language: If you want the labels in a particular language, add the sentence below to the end of the prompt.
- Spelling mistakes: If the text in the image has errors, generate it once more. Read every word letter by letter before posting.
- Trademark rights: Be careful about trademark rights when using another brand's product photo. Work with photos of your own product.
- Staying true to reality: In a sales image, the product should look the way it really is. If the color, size or number of parts has changed, don't use that image for sales.
Write the labels in [language].Adapt it to your business: sample use cases.
These are all examples; try them with a photo of your own product:
- Handmade soap / cosmetics workshop: a marketplace image with /whitebg, a campaign image with /packshot (ingredients: "lavender sprigs, olive oil drops, foam"), the soap's texture with /macro.
- Ceramics / home decor: a breakfast table composition with /flatlay, a four-season campaign with /seasons, color options with /catalog (only colors you actually sell).
- Phone accessories / small electronics: the internal structure with /xray, 4 features with /infographic (your own details, such as "fast charging, 20 W, 120 grams, 1-year warranty"), the unboxing with /unboxing.
- Cafe / bakery: an isometric model of your shop with /isometric, a floating ad frame of a single product with /levitate, a story sticker with /sticker.
How to measure it
For the same product, post for one week with your old photo and for one week with images generated with these prompts. Compare the saves, shares and profile visits on your posts; on your e-commerce site, compare the product page's click-through and add-to-cart rates.
Sources
- AOpenAI Community: Introducing GPT Images 2.5 in the API and ChatGPTPrimary source · checked: October 29, 2026
- BDataNorth: OpenAI launches ChatGPT Images 2.5Industry research · checked: October 29, 2026
- BTestingCatalog: OpenAI launches ChatGPT Images 2.5 with faster editingIndustry research · checked: October 29, 2026
- DDijiKoçum test: 5 unbranded product photos, before/after with the same prompts (October 29, 2026)Our own data · checked: October 29, 2026
[A] primary source · [B] industry research · [C] practitioner · [D] our own data
Frequently asked questions
Why doesn't it work when I type /packshot into ChatGPT?
Because /packshot isn't a built-in ChatGPT command; it's the prompt's short name. Either paste the full prompt, or set up a Project with the shortcut setup at the end of the page; in that project, the photo + /packshot is all you need to type.
If I type the same prompt, will I get the same image as in the carousel?
No, you'll get the same style, but not an exact copy. Every generation is a little different; if you don't like it, generate again in the same chat or say what you want to change.
What language should I write the prompts in?
The prompts here are already in English and can be used as they are. If you want the labels in the image in a particular language, add "Write the labels in [language]." to the end of the prompt; if there are spelling mistakes, generate it once more.
What do I write in the square brackets?
Only the /packshot and /infographic prompts have them. In /packshot, write your product's ingredients in place of [INGREDIENTS …]; in /infographic, write your product's 4 features in place of [THE PRODUCT'S 4 FEATURES]; delete the square brackets.
Does it work with a free ChatGPT account?
Image generation allowances and limits vary by plan, and OpenAI updates them often. Try generating an image on your own account; if you hit the limit, ChatGPT will tell you.
Can I use another brand's product photo?
It's not recommended. Be careful about trademark rights when using another brand's product; work with photos of your own product and don't show your product in a way it doesn't really look in a sales image.
Next step
Let’s look at your site together.
Free Digital Checkup: a health score for your website, your ads and your visibility in AI search, plus what to fix first. 3 minutes.
More guides
Tools
5 Free Animation Skills for Claude Code: How to Install Three.js, GSAP, design-dna, LottieFiles and Genjutsu (Step by Step)
16 steps · 9 min
Tools
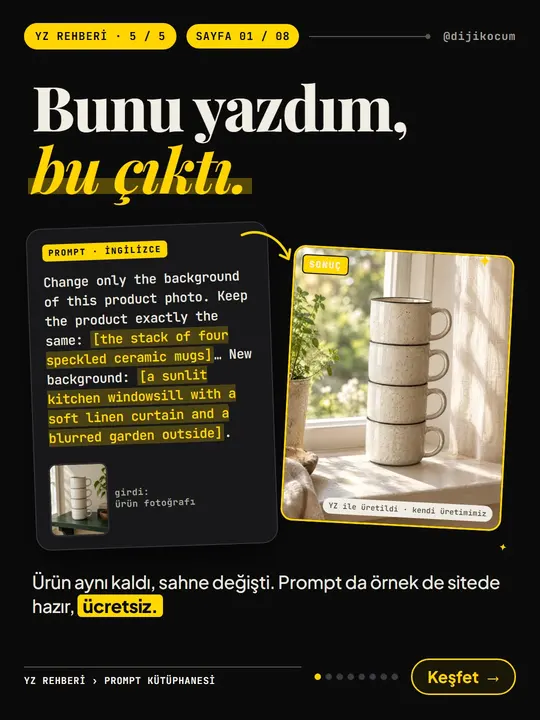
How to Use the Prompt Library and Prompt Builder: Copy a Ready-Made Prompt, Fill In the Blanks
9 steps · 7 min
Tools
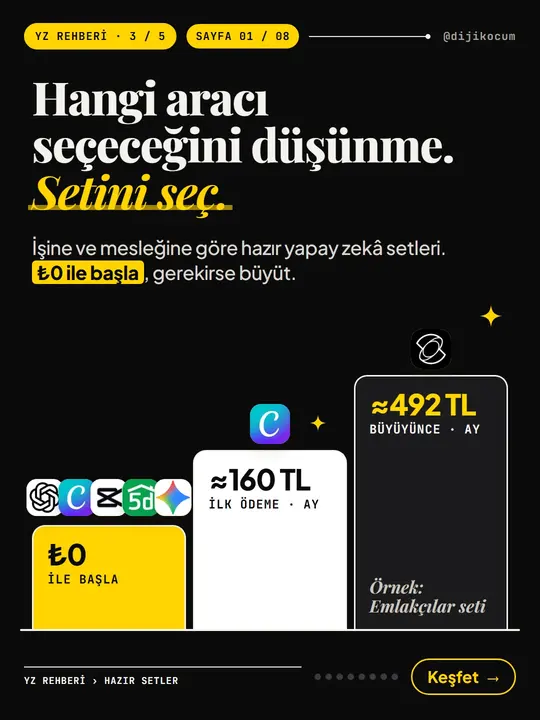
How to Use the Ready-Made AI Kits: Pick One for Your Profession or Business and Start at $0
9 steps · 6 min